
5 Steps How to Use the Full Living Soil Patio Kit and Grow Organic Food (Easy Guide for Beginners)
By Jeremy Standring
At Regen Soil, we believe that the secret to nutrient-dense, flavorful food isn’t found in a bottle of synthetic fertilizer, but in the complex, microscopic city thriving beneath your plants. Most beginner gardeners start with "dead" dirt from a big-box store: sterile medium that requires a constant IV drip of chemicals just to keep a tomato plant upright.
We’re here to change that.
If you’ve recently picked up our Full Living Soil Patio Kit, you’re no longer just a gardener; you’re a micro-manager of a biological workforce. By using Rhizo Logic® (our specialized living soil system) and Bio-boost (the premier Terrabiotics catalyst), you are restoring the natural cycle of regenerative agriculture right on your balcony.
In this guide, we will walk you through the exact five-step process to set up your patio garden for long-term success, ensuring your supermarket salad transition from "crunchy water" to a nutritional powerhouse.
What Exactly is Living Soil (Rhizo Logic®)?
Before we dive into the steps, we need to define our terms. Living soil is a planting medium that contains a diverse community of beneficial bacteria, fungi, protozoa, and nematodes. Unlike conventional soil which relies on soluble salts (NPK) to feed the plant directly, living soil utilizes the Soil Food Web to cycle nutrients naturally.
Rhizo Logic® represents our proprietary approach to this ecosystem. It focuses on the rhizosphere: the area immediately surrounding plant roots: where the most critical biological transactions occur. When you use a Rhizo Logic® system, you aren't just feeding the plant; you are feeding the soil, which in turn feeds the plant.
Living Soil vs. Conventional Potting Mix: A Comparison
| Feature | Conventional Potting Mix | Rhizo Logic® Living Soil |
|---|---|---|
| Nutrient Source | Synthetic Liquid Fertilizers | Organic Matter & Microbial Cycling |
| Microbial Life | Mostly Sterile | Biologically Diverse (Fungi, Bacteria) |
| Sustainability | High Runoff, Peat-Heavy | Regenerative, Reusable |
| Effort Level | Constant Monitoring & Feeding | "Water Only" After Setup |
| Flavor/Nutrition | Standard / Low | Enhanced Terpenes & Minerals |
Step 1: The Biological Ignition (Mixing and Curing)
The first mistake many beginners make is planting directly into dry soil the moment it arrives. We recommend a "curing" phase to wake up the dormant microbes in your kit.
- Empty the Base: Pour your base soil into a large container or the fabric pots provided in the kit.
- Add the Catalyst: This is where Bio-boost (our Terrabiotics solution) comes in. Bio-boost acts as the high-octane fuel for your microbial population.
- Hydrate to Field Capacity: Slowly add water while mixing. You are looking for field capacity: this means when you squeeze a handful of soil, it feels like a wrung-out sponge. Only a drop or two of water should come out.
- The Wait: Let the soil sit for 7 to 10 days. This allows the bacteria and fungi to colonize the organic matter. You might notice a white, fuzzy growth on the surface; don't panic! That’s saprophytic fungi, a sign that your soil restoration is working perfectly.

Step 2: Optimizing Gas Exchange (Container Setup)
Your Full Living Soil Patio Kit likely includes fabric pots. We prefer these over plastic for a scientific reason: Oxygenation.
Living soil is an aerobic system. The beneficial microbes we want to cultivate: the "good guys" in the Rhizo Logic® ecosystem: thrive on oxygen. Plastic pots can create anaerobic (oxygen-poor) pockets at the bottom, which leads to root rot and the growth of harmful pathogens.
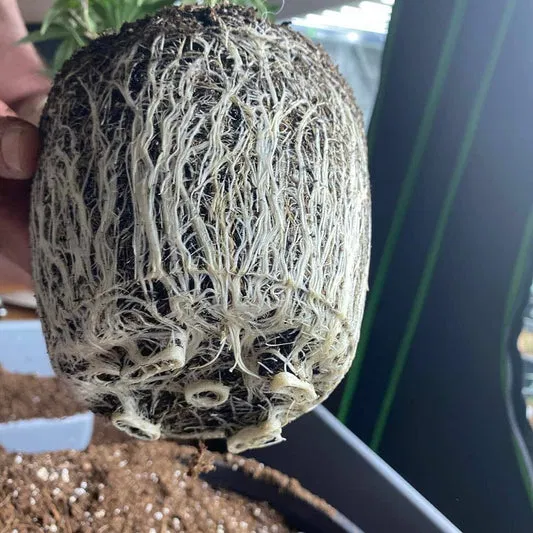
- Air Pruning: As roots reach the edge of the fabric pot, they are exposed to air, which naturally "prunes" the tip. This signals the plant to send out more lateral feeder roots, creating a massive, dense root system rather than a "root-bound" spiral.
- Drainage: Ensure your pots are elevated slightly off the patio floor using "pot feet" or a saucer with stones. This prevents the bottom from becoming a stagnant swamp.
Step 3: The Inoculation Phase
Once your soil is cured and in its pot, it’s time to focus on the Rhizosphere. This is the most critical step for beginners to get right.
When you transplant your organic seedlings (whether it’s kale, tomatoes, or herbs), you want to apply a concentrated dose of microbes directly to the root ball. In our Rhizo Logic® system, we focus on mycorrhizal fungi and PGPR (Plant Growth-Promoting Rhizobacteria).
- Dig the Hole: Make a space slightly larger than the seedling's current root mass.
- Direct Contact: Sprinkle your microbial inoculant directly onto the roots and into the hole.
- The Handshake: These microbes form a symbiotic "handshake" with the plant. The plant provides sugars (exudates), and the microbes provide minerals and protection from pests.
Step 4: Building the Soil Sponge (Layering and Mulching)
In nature, soil is never naked. To maintain the soil restoration you’ve started, you must protect the surface.
We recommend a two-layer approach:
- The Living Layer: Many of our users sow a "cover crop" (like clover) around their main plant. This keeps the soil structure intact and provides nitrogen. Check out our guide on cover crops here.
- The Mulch Layer: Add a layer of barley straw or wood chips on top. This acts as a "skin" for the soil, regulating temperature and preventing the water from evaporating too quickly.
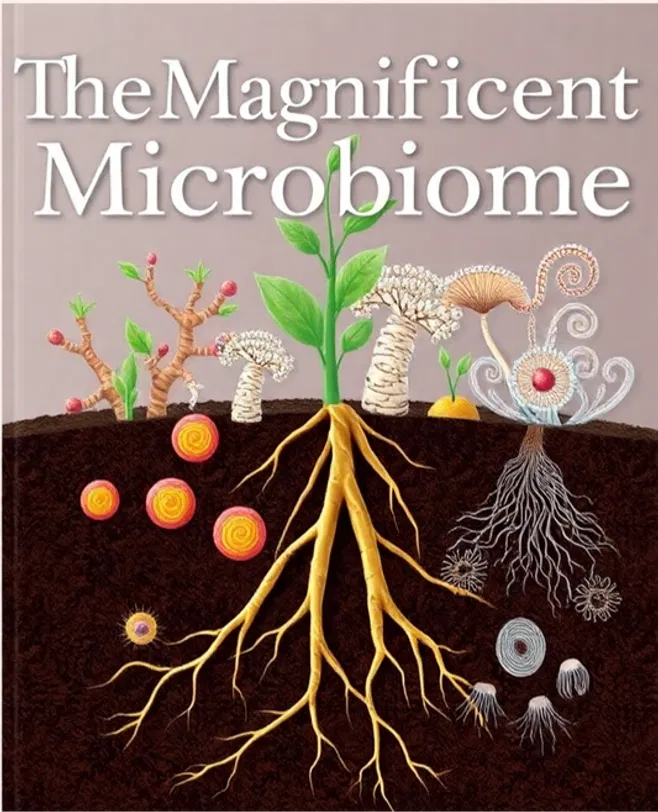
This "sponge" effect ensures that the protozoa and bacteria: the underground economy of your garden: can move through the moisture films in the soil to do their jobs.
Step 5: The Water-Only Cycle
The beauty of the Full Living Soil Patio Kit is that if you've followed the steps above, you can throw away your measuring spoons and pH meters. This is a water-only system.
However, "water-only" doesn't mean "neglect." Here is how we manage hydration in a living system:
- No Chlorine: Tap water often contains chlorine or chloramine designed to kill bacteria. Since your soil is bacteria, we recommend using a simple carbon filter or letting your water sit out for 24 hours to off-gas.
- Moisture Consistency: Living soil should never fully dry out. If the soil becomes hydrophobic (repels water), the microbial populations will crash.
- Periodic Bio-boost: While the soil is self-sustaining, a monthly application of Bio-boost (Terrabiotics) can act as a probiotic "top-up," especially during the heavy flowering or fruiting stages of your organic food.
Why Beginners Fail (and How to Avoid It)
Even with the best kit, there are common pitfalls. We have analyzed hundreds of patio grows and found these "Big Three" mistakes:
- Overwatering: Beginners often drown the soil, driving out the oxygen and killing the Rhizo Logic® biology.
- Using Pesticides: Even "organic" pesticides can sometimes harm the delicate balance of your soil's microbial architects. Stick to biological controls like Neem oil or beneficial insects if possible.
- Impatience: Regenerative systems take a moment to "click" into place. Give your soil the 7-day cure time!
For a deeper dive into these pitfalls, read our article on 7 mistakes you’re making with living soil.

Frequently Asked Questions (FAQ)
Q: Can I reuse the soil from my Patio Kit next year? A: Absolutely! In fact, living soil usually gets better with age. You simply need to "re-amend" it with some fresh compost and a dose of Bio-boost to replenish the nutrients used by the previous crop.
Q: Why is my soil getting warm during the curing phase? A: That is thermal energy produced by microbial respiration. It’s a great sign that your Rhizo Logic® biology is active! Just wait for it to cool down to ambient temperature before planting.
Q: Do I need to check the pH of my water? A: In a living soil system, the microbes act as a "buffer." They adjust the pH in the rhizosphere to suit the plant's needs. As long as your water isn't extreme (above 8.5 or below 5.5), the biology will handle the rest.
Q: I see small gnats flying around. Is my soil ruined? A: Fungus gnats are common in moist, organic soil. They are usually a sign of slight overwatering. You can manage them easily with sticky traps or by letting the top inch of mulch dry out. Read our full battle plan for gnats here.
Ready to Grow?
Growing your own organic food on a patio is one of the most rewarding ways to participate in the regenerative agriculture movement. By choosing a Full Living Soil Patio Kit, you are choosing health, sustainability, and the incredible flavor that only nature (and a few billion microbes) can provide.
Do you have questions about your specific setup or climate? Leave a comment below or reach out to our team at Regen Soil. We’re here to help you transition from a "dirt gardener" to a true soil steward.
Let's grow something amazing together!


