
The Ultimate Guide to Soil Restoration: Everything You Need to Succeed on a Budget
By Jeremy Standring
At Regen Soil, we believe that the foundation of all life begins beneath our feet. For too long, conventional agriculture has treated soil like a sterile medium meant only to hold plants upright while we dump synthetic chemicals into it. We are here to tell you that there is a better way. Regenerative agriculture isn't just a buzzword; it is a vital shift toward restoring the biological systems that allow nature to thrive.
Restoring degraded soil doesn't require a massive capital investment or a degree in agronomy. Whether you are managing a backyard garden or a small-scale commercial operation, you can rebuild your land’s fertility using high-quality biological principles and "curbside" resources. In this guide, we will break down the science of soil restoration and provide a practical roadmap to achieving living soil status on a budget.
Understanding the Science: What is Soil Restoration?
Before we pick up a shovel, we need to understand what we are trying to fix. Soil restoration is the process of recovering the biological, physical, and chemical integrity of the soil. Most "dead" soil is characterized by compaction, a lack of microbial populations, and depleted organic matter.
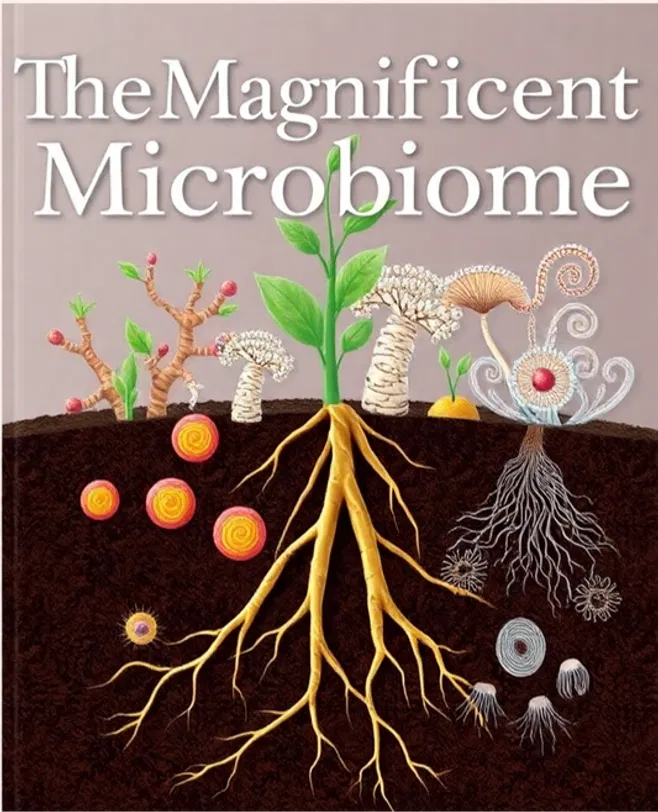
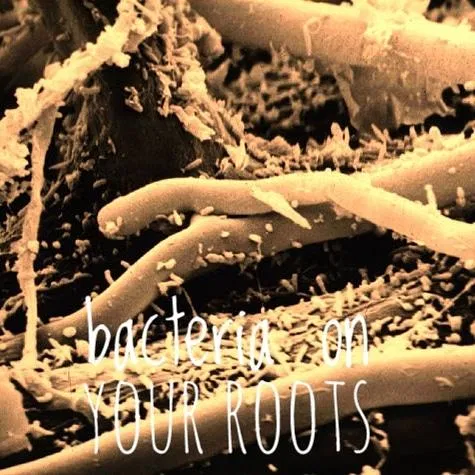
When we talk about Living Soil, we are specifically referring to Rhizo Logic®. This is soil that isn't just dirt; it’s a functional ecosystem. In this system, nutrient cycling occurs naturally through the interaction of plants and microbes. Plants exude sugars (exudates) into the soil to feed bacteria and fungi, and in exchange, these microbes mine minerals from the soil and deliver them back to the plant roots in a plant-available form.
The Core Components of Restored Soil:
- Microbial Biomass: The total mass of living organisms (bacteria, fungi, protozoa) in the soil.
- Soil Structure: The arrangement of soil particles into aggregates, which allows for oxygen exchange and water infiltration.
- Organic Matter: The decaying plant and animal material that serves as the "battery" for the soil ecosystem.
- Carbon Sequestration: The process by which CO2 is captured from the atmosphere and stored in the soil as stable organic carbon.
Comparison: Living Soil (Regenerative) vs. Chemical Inputs (Conventional)
To understand why we prioritize restoration over fertilization, let’s look at how these two approaches compare.
| Feature | Conventional (Chemical-Based) | Regenerative (Living Soil) |
|---|---|---|
| Nutrient Source | Synthetic N-P-K salts | Biological nutrient cycling |
| Soil Structure | Often compacted/degraded | Highly aggregated and porous |
| Water Retention | Low; requires frequent irrigation | High; organic matter acts like a sponge |
| Cost | Recurring and increasing | Decreasing as biology takes over |
| Environmental Impact | Runoff and GHG emissions | Carbon sequestration and biodiversity |
While chemical fertilizers provide a quick hit of nutrients, they ultimately "burn out" the soil's natural biology. By focusing on soil restoration, we are building a self-sustaining system that gets better every year.
The Budget-Friendly Restoration Strategy
You don't need to spend a fortune to see results. In fact, many of the best tools for restoration are currently sitting in your kitchen or on your neighbor’s curb.
1. Harnessing "Curbside Carbon"
The most expensive part of soil restoration is often the organic matter. However, carbon is everywhere.
- Leaves and Grass Clippings: These are nitrogen and carbon goldmines. In the fall, collect bags of leaves from your neighborhood. Spread them over your soil as mulch or compost them.
- Wood Chips: Many tree services are looking for places to dump wood chips for free. Use these to build fungal-dominant pathways or as a heavy mulch layer to suppress weeds and retain moisture.
- Used Coffee Grounds: A fantastic nitrogen source that you can get for free from local cafes.
2. Kitchen Scrap Solutions
Don't throw away nutrients.
- Banana Peels: These are packed with potassium and calcium. Bury them directly in your garden beds.
- Eggshells: Dry them, crush them into a fine powder, and add them to your soil to boost calcium levels.
- Compost Tea: You can make a "microbial super-drink" for your plants by steeping high-quality compost in a bucket of water for 24 hours. This inoculates your soil with beneficial biology for the price of a bucket and some water.
3. Manual Aeration
Compaction is the enemy of soil restoration. Without air, beneficial aerobic microbes die off, and pathogens take over. You don't need to rent a machine; a simple pitchfork or broadfork can be used to gently lift and crack the soil, allowing oxygen to reach the root zone without flipping the soil and destroying fungal networks.
Scaling Up: The Rhizo Logic® and Bio-boost Advantage
For those looking to accelerate their results, we recommend integrating targeted biological inputs. While you can build soil for free, professional-grade inoculants can shave years off the restoration process.
Rhizo Logic® (The Inoculant)
When we refer to Rhizo Logic®, we are talking about a specific approach to Living Soil. It involves introducing a diverse spectrum of beneficial microbes directly into the rhizosphere (the area around the roots). This ensures that from day one, your plants have the microbial partners they need to thrive.
Bio-boost by Terrabiotics (The Catalyst)
Restoration requires energy. Bio-boost acts as a "Terrabiotic" catalyst. It provides the complex carbohydrates and organic acids that wake up dormant microbes and stimulate rapid growth. We have found that combining free organic matter with a professional catalyst like Bio-boost leads to significantly faster carbon sequestration and improved plant vigor.
Step-by-Step Guide to Restoring Your Soil
Follow this hierarchical process to transition your land from "dirt" to living soil.
Step 1: Initial Assessment
You cannot manage what you do not measure. We highly recommend starting with an Initial Soil Health (ISH) Assessment. This isn't just a standard N-P-K test; it analyzes the biological activity and physical structure of your soil.
- Beginners: Look for earthworms and smell the soil. It should smell earthy, not sour or like rotten eggs.
- Pros: Use digital sensors to monitor EC (Electrical Conductivity) and moisture levels.
Step 2: Clear and De-compact
Remove any invasive weeds (but try to leave the roots of beneficial plants if possible). Use a pitchfork to aerate the soil as described above.
Step 3: Inoculate with Rhizo Logic®
Apply your microbial inoculants. This is the moment you introduce the "workforce" to your soil. If you're on a tight budget, this is the one area where we suggest investing, as a high-quality inoculant ensures you aren't just growing "random" bacteria, but the right ones.
Step 4: Add the "Skin" (Mulch)
Nature never leaves the soil bare. Cover your inoculated soil with at least 2-4 inches of organic mulch (leaves, straw, or wood chips). This protects the microbes from UV rays and keeps the soil moist.
Step 5: Feed the System
Apply Bio-boost (Terrabiotics) to provide an immediate food source for your new microbial population. This jumpstarts the nutrient cycling process.
Monitoring Your Progress
As you move through the RSI Method (Regen Soil Innovations Method), you should see measurable changes. Digital tools have made this easier than ever. For example, using a soil pulse device allows you to track nutrient levels and temperature in real-time.
What to look for:
- Darker Soil Color: An indication of increased carbon and organic matter.
- Better Water Infiltration: Water should soak in immediately rather than pooling on the surface.
- Increased Aggregation: The soil should look like "chocolate cake" or cottage cheese, held together by microbial glues (glomalin).

Frequently Asked Questions (FAQ)
Q: How long does soil restoration take?
A: While true restoration is an ongoing process, you can see significant improvements in plant health and soil structure within a single growing season if you use high-quality inoculants and provide adequate organic matter.
Q: Can I restore soil that has been heavily sprayed with chemicals?
A: Yes! However, you must first stop the chemical inputs to allow the microbial populations to establish. Using a product like Bio-boost can help detoxify the environment by stimulating microbes that break down chemical residues.
Q: Is "Living Soil" the same as potting soil?
A: Not necessarily. Most store-bought potting soils are sterile. Living Soil (like our Rhizo Logic® products) is teeming with active biology. You can learn more about our specific mixes on our 5-gallon living soil page.
Q: Why do you emphasize fungi over bacteria?
A: Most degraded soils are bacterially dominant because bacteria survive tillage and chemicals better than fungi. However, fungi are responsible for building soil structure and long-term carbon storage. Our goal is to restore a healthy fungal-to-bacterial ratio.
Conclusion: Start Where You Are
Soil restoration is the most important work we can do for the planet and our own food security. It doesn't require a massive budget, just a shift in mindset from "feeding the plant" to "feeding the soil." By utilizing free local resources and strategic biological inputs like Rhizo Logic® and Bio-boost, you can transform your land into a thriving, productive ecosystem.
We are here to support your journey. If you are ready to take the next step in your regenerative journey, check out our blog for more technical guides, or contact us for a personalized Soil Health Assessment.
What’s your biggest challenge with your soil right now? Let us know in the comments below, and let’s start a conversation about restoring our earth together!


